Embellishing your nails with DIY nail charms is a creative way to add a touch of personality to your manicure. These tiny decorations can transform a simple nail design into a striking fashion statement. With a plethora of styles, from elegant crystals to playful shapes, charms for nails allow for endless possibilities in personalizing your look. This guide will walk you through the entire process, ensuring that your nail art stands out impeccably.
Choosing the Best Glue for Nail Charms

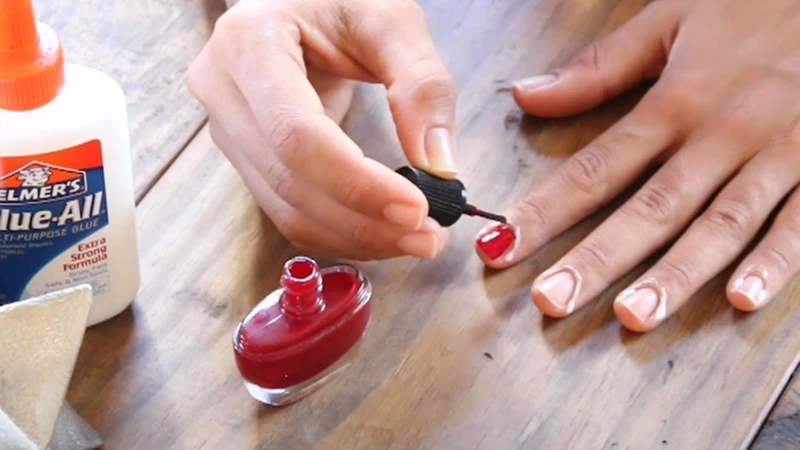
Securing your nail charms effectively is crucial for both the appearance and longevity of your nail art. The adhesive you choose plays a pivotal role in this process. Let’s explore the options available and find the best glue for nail charms that suits your needs.
Nail Glue Guide: Pros and Cons
- Pros: Nail glue is specifically formulated for adhesion to natural and artificial nails. It provides a strong bond that can withstand daily activities.
- Cons: It can be difficult to remove and may damage the natural nail if not properly applied or removed.
Comparing Nail Glue and Resin
While nail glue is widely used, resin is another contender in the realm of nail adhesives. Resin tends to be thicker and offers a more controlled application, but it requires a UV lamp to cure, which may not be convenient for everyone. Deciding between the two boils down to personal preference and the specific requirements of your nail charm design.
Why Gel Polish May Be Your Best Bet
Gel polish presents itself as a versatile alternative when considering how to attach charms on nails. It acts as a two-in-one solution, serving both as a polish and an adhesive when cured under a UV lamp. The semi-permanent nature of gel polish ensures a long-lasting hold, making it a favorite for many nail art enthusiasts.
Step-by-Step Nail Charm Application Tutorial
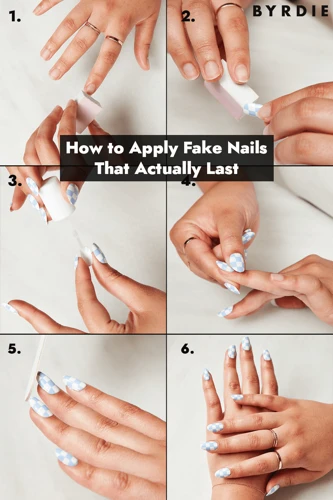
Applying charms to nails requires precision and patience. Follow this nail charm application tutorial to achieve a flawless finish.
Preparing Your Nails for Charm Application
- Clean your nails thoroughly and ensure they are dry and free of oils.
- Apply a base coat and let it dry completely to create an ideal surface for the charms to adhere to.
Applying Charms to Nails Using Nail Glue
Place a tiny drop of nail glue on your nail where you want the charm to be. Using tweezers, carefully set the charm onto the glue and hold it in place for a few seconds until the bond sets.
Securing Charms with a Clear Base Coat
For smaller charms, a clear base coat might suffice. Apply the coat and then place the charm on the wet polish. The drying process will secure the charm in place.
Attaching Charms Using Gel Polish
If you’re using gel polish, apply a layer and cure it slightly under a UV lamp, so it’s still tacky. Place the charm and then cure it fully to lock everything in place.
Finalizing with Tacky Polish Dots for Extra Hold
To ensure extra hold, apply small dots of tacky polish around the edges of larger charms. This helps to anchor them more securely to your nails.
Ensuring Long-Lasting Nail Charms
Ensuring your nail charms stay put is just as important as the initial application. With the right maintenance tips, you can keep your nail art looking pristine.
Maintenance Tips for Nail Art
- Avoid using your nails as tools, which can put undue stress on the charms.
- Wear gloves while doing household chores to protect your manicure.
- Reapply a top coat every few days to reinforce the charms’ adhesion.
Top Coat Application for Charm Longevity
Regularly applying a top coat over your nail charms acts as a shield against wear and tear. Opt for a high-quality top coat that won’t yellow or chip, maintaining the integrity of your nail art.
Nail Design Ideas Incorporating Charms
Incorporating charms into your nail designs can be as simple or elaborate as you desire. Here are some nail design ideas to inspire your next manicure.
Creative DIY Nail Charms Inspirations
Experiment with mixing and matching different charm sizes and colors to create a unique pattern. Or, use charms to accentuate a particular theme, such as floral or geometric designs, for a cohesive look.
Combining Different Charms for Unique Nail Art
Combine various charms to add depth and interest to your nail art. Think of pairing metallic studs with delicate rhinestones or arranging charms in an ombre effect for a visually striking result.
If you’re interested in nail art and want to enhance your manicure with some extra sparkle, you might enjoy our guides on nail embellishments. Learn the proper techniques with our tutorial on how to glue gems on nails to add that perfect touch of glamour. For those new to artificial nails, we also have comprehensive instructions on how to glue on nails and a step-by-step guide for how to do glue-on nails, ensuring your nail game is always on point. Whether you’re looking to bedazzle with charms or achieve a flawless application of fake nails, our articles have got you covered!
Conclusion: Mastering the Art of Nail Charms
With patience and practice, you can master the art of applying and maintaining nail charms. Whether you opt for subtle accents or bold statements, charms for nails can elevate any manicure. Remember to choose the right adhesive, apply with precision, and care for your nail art to ensure its longevity. Embrace these nail art tips, and let your creativity shine through your fingertips.