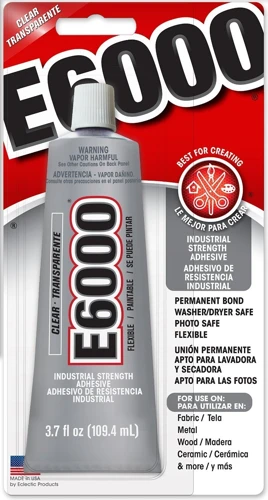
When it comes to versatile adhesives, E6000 glue is a popular choice among crafters, DIY enthusiasts, and professionals alike. Its strength and flexibility make it ideal for a multitude of projects. However, for those who are new to using this powerful adhesive, understanding the correct E6000 glue usage can make all the difference between a successful application and a sticky mess.
Opening E6000 Adhesive: Step-by-Step Guide
Preparation: Tools and Safety
Before you embark on opening E6000 adhesive, it’s crucial to prepare both your workspace and yourself. Ensure that you have a clean surface and gather necessary tools such as pliers or a utility knife. Safety is paramount, so don’t forget to don gloves and eye protection to safeguard against potential skin and eye irritation.
Step 1: Understanding the E6000 Glue Cap
The E6000 glue cap is uniquely designed to prevent drying out, but it can also be a bit tricky to open. Familiarize yourself with its mechanism – usually a twist or snap cap – which is often accompanied by a built-in pin to pierce the seal.
Step 2: Applying Heat to the Cap
If the cap seems stuck, a gentle application of heat can help. Use a hairdryer to warm the cap, making the residue less viscous and easier to open. Be cautious not to overheat, as the glue inside could become too runny.
Step 3: Using Tools to Assist Opening
If the cap is still stubborn after heating, you can use tools to assist. Grip the cap with pliers and turn gently, or carefully use a utility knife to slice through any dried glue obstructing the cap.
Unclogging E6000 Nozzle Techniques
Cleaning the Nozzle After Use
To prevent clogs, it’s imperative to clean the nozzle after each use. Wipe away excess adhesive and seal the cap tightly. This helps ensure that your next unclogging E6000 nozzle experience is as smooth as the first.
Dealing with Hardened Glue
In the event you encounter hardened glue, you can remove the nozzle and soak it in acetone or a similar solvent. This will dissolve the glue, making the nozzle clear for future use.
Applying E6000 Glue: Best Practices
Surface Preparation
The key to a strong bond is proper surface preparation. Ensure that surfaces are clean, dry, and free of dust or oil before applying E6000 glue. This helps in creating an optimal environment for the adhesive to adhere.
Glue Application Tips
For best results, apply a thin layer of the adhesive to one surface and press the items together. Allow for enough time for the bond to cure, following the manufacturer’s recommended drying time to achieve maximum strength.
How to Use E6000 for Various Materials
E6000 on Fabrics
When using E6000 on fabrics, apply a thin coat and give it time to penetrate the fibers. Be mindful that the glue remains flexible even after drying, which is perfect for wearable items.
E6000 on Hard Surfaces
For hard surfaces like ceramics, glass, or metal, E6000 provides a durable bond. Clean the surfaces thoroughly and apply the glue sparingly to avoid oozing, which could compromise the finish of your project.
E6000 Glue Tips for Maintenance and Storage
Proper Storage Techniques
Maintaining the integrity of your glue ensures longevity and ease of use. Store your adhesive in a cool, dry place with the cap securely fastened. This simple E6000 glue tip can prevent premature drying and waste.
Maintenance of the Glue Tube
Regular maintenance of the glue tube can prevent frustration during your next project. Keep the threads of the tube clean and avoid cross-threading the cap, which could lead to improper sealing and drying out.
E6000 Solvent: Safe Removal and Cleaning
When you need to remove any excess or spillage, an E6000 solvent like acetone can be used to clean up the adhesive. Apply the solvent to a cloth and gently rub the affected area until the glue lifts off.
Troubleshooting Common E6000 Glue Issues
Preventing and Fixing Leaks
Tube leaks can be messy and wasteful. To prevent them, avoid cutting the tip of the nozzle too low. If a leak occurs, wrap the tube in plastic wrap and secure it with a rubber band as a temporary fix.
Addressing Weak Bonds
A weak bond can be the result of insufficient glue or improper surface prep. Reassess the application process, ensuring that you’re following the E6000 adhesive instructions for surface prep and glue amount.
Conclusion: Mastering E6000 Adhesive Instructions
Mastering E6000 adhesive instructions can elevate your crafting and repair tasks to professional levels. With practice and adherence to the guidelines provided, you’ll be able to tackle any project with confidence.


